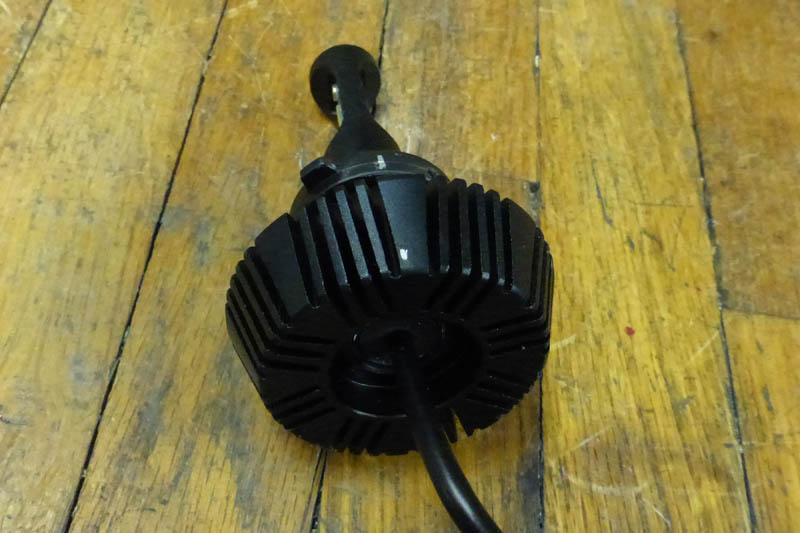
This picture shows the bulb after the chuck is aligned and the final marks are in place.
It is ready to install now.
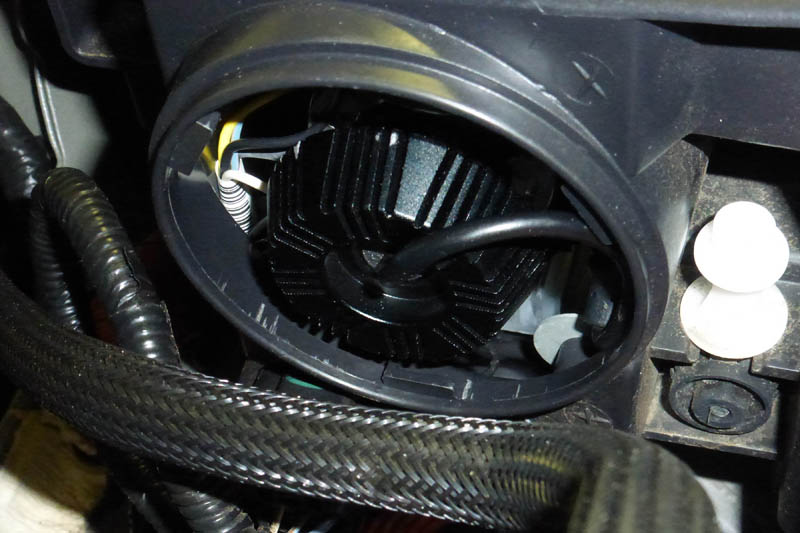
This shows one of the bulbs installed and the driver, cables, and connectors placed in the cavity with the bulb.
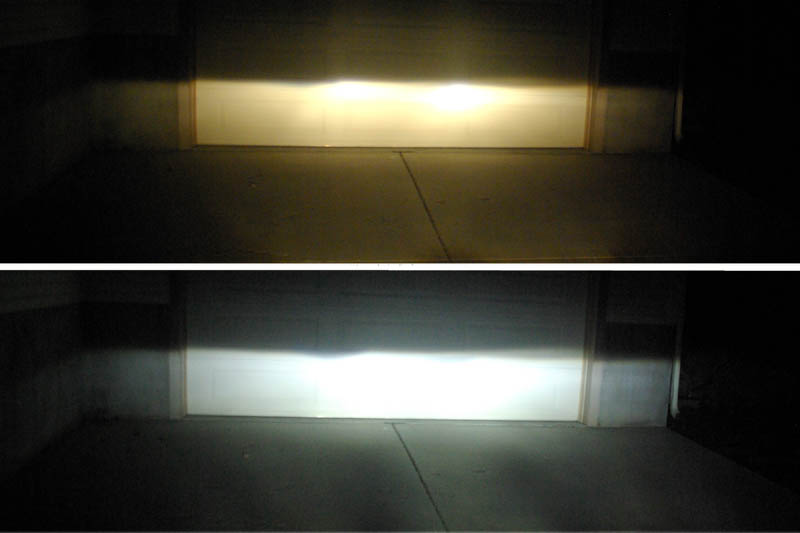
I parked the car on a flat driveway in front of a garage door and took beam pattern pictures
both with the original halogen bulbs and after installation of the LED ones. I would like to have used
a white door, but the one I had is light beige. I was careful to park the car in the same location
and use the same manual camera settings for both pictures. I used f3.5 at 1/45 second and
ISO 1600. As you can see, the LEDs produce a more uniform and brighter beam than the halogens,
and there was none of the yellow/orange color of the halogens.
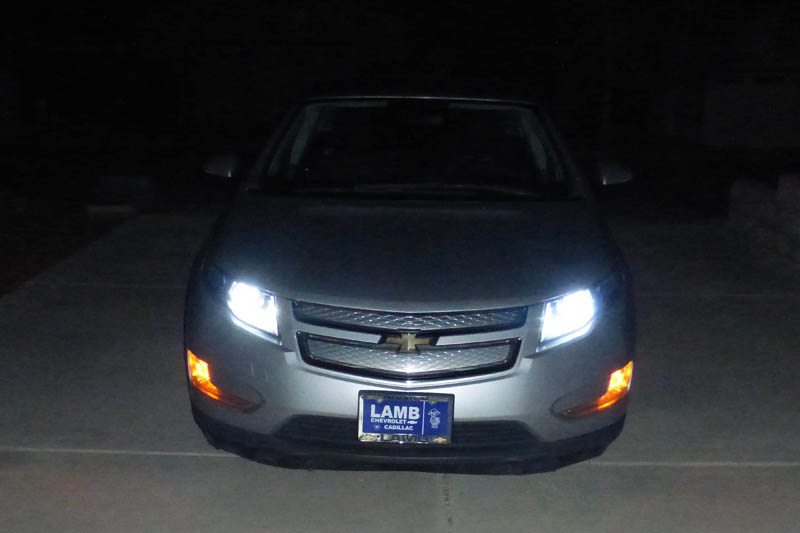
The picture of the front of the car shows the color the bulbs produce: a bright white with just a
touch of blue. Proportedly, the blue tint will fade over the first several hours of use
So
far I have only done a little night driving since the installation, but
what I have seen is very promising. They definitely light the road and
distant objects better than the halogens and I think the whiter light
adds to the better visibility. The beam cutoff is still very sharp and
appears to be exactly where it was with the halogens.
I would like to note that I installed this kit directly replacing the halogen lights. I did not use a relay harness or extra capacitors and the light is steady and bright with no trace of flicker or other anomalies.
I would like to note that I installed this kit directly replacing the halogen lights. I did not use a relay harness or extra capacitors and the light is steady and bright with no trace of flicker or other anomalies.
Interior LED lighting.
While I was shopping on Amazon, I found a pack of ten #194 wedge base high power LED bulbs for $12 (https://www.amazon.com/gp/product/B0...?ie=UTF8&psc=1) and couldn't resist. They are also JDM ASTAR bulbs. They list a whole string of bulb numbers that these replace. All of my interior lights and the license bulbs are on the list. After receiving them, I tried one in the hatchback light on the left side panel, as it was the easiest to change. I really liked what I saw and continued to replace both map lights, the front dome light between the map lights, and the two rear seat dome lights. The jury is still out on the license plate as some have reported interference with the backup camera with LED lights there. Having just replaced my backup camera, I don't want to screw it up now. I may try later. If you try these or similar bulbs, remember that they are polarity sensitive. If you plug one in and it doesn't light, turn the bulb around and try it the other way. There are some reviews for these bulbs where users report that 4, 5, or even 6 of the 10 bulbs are defective. They obviously did not turn the "bad" ones around!
Note: I did relent and install a pair of these bulbs in the license plate lights. They work great and do not interfere with the backup camera at all.
The LEDs inside really light it up. It's like daylight with both map lights and the dome lights on. I never
use the map lights while driving, but someone on the forum used red LEDs and reported great illumination
and minimum interference with his night vision. This picture was taken with only the dome light on.
Conclusions:
Just for kicks I ran some calculations on the performance gains and the savings resulting from the reduced current flow using LEDs. I used some assumptions such as the headlights would be on for 10% of my driving, and that the dome lights would be on for about 5 minutes for a typical 38 mile charge cycle. I also used a very low kWh rate of .03 per, as that is about what my electric company, APS pays me for the excess power from my rooftop solar at the end of each year. If I were paying normal electrical costs, the payback would be about 5 times faster.
The results:
For the increase in range on a nominal 38 mile charge, the dome light change would add 19 feet to the range. The headlights would add about 119 feet! Woo Hoo!!
As far as return on investment, the combination of all the LEDs would reach break even at about 19 million miles! (Really!) Of course without my solar and the resulting higher electric rates, it would be ONLY about 4 million miles!
I think you need to just want the LEDs and forget about the fantastic savings!
I think that as it stands today, the only incandescent bulbs remaining are my front turn signals (switchbacks coming soon!), my visor vanity lights, and my backup light. I was very disappointed with my backup light until I replaced my backup camera. Now it is not that bad.
Dick
R. S. Mason
1/8/17