Dick Mason's Electric Vehicle (EV) Conversion ProjectPart 1
Initial preparation, tooling up, and disassembly.
WARNING!
This writeup is not a "how-to" manual,
but only a history of what I did to convert my truck to electric
power.
120 volts DC is very dangerous and can be lethal! If you
decide to
do similar things to what I did, be sure you understand the proper
methods
of dealing with high voltage and the possible consequences!
If you
do not have a total understanding of how to safely work with high
voltage,
DO NOT DO IT!
Well, I am off on another adventure! This time it is not a motor home trip, an ocean cruise, or anything like that. I am about to convert a Chevy S-10 pickup truck to electric power! My Background First, for those of you who don't know me, let me tell you a little about myself: I am a retired mechanical engineer, who spent much of my
career working
with computers and automation. I was born in 1937 (you can do
the
math!) I have a fairly complete machine shop at home,
including
a lathe, small milling machine, drill press, bench grinders, etc., so I
can do some operations more easily than someone without these tools. I
have arc, gas, and spot welders, but am not a very good
welder.
I also have a good collection of hand tools, measuring equipment, and
electronics
tools and test equipment. In general, if it breaks, I can fix
it.
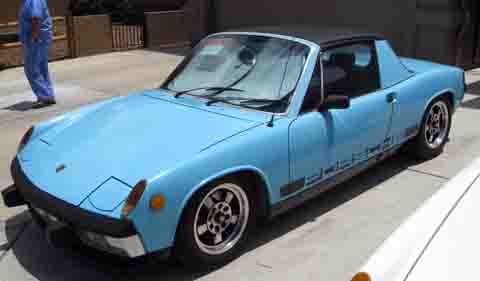
My Initial Options I have dreamed of doing a project like this for many years, but never got serious. Lately I have been reading many, many articles on-line and reading a number of books about electric vehicles. I decided "Hey, I can do this!" and started having some serious dreams. After scoping out several possible approaches, I narrowed my choices to two widely different possibilities: 1) Convert a Porsche 914 sports car, or 2) a Chevy S-10 pickup truck. The Porsche would be a lot of fun, and less work, as there are kits available with all the parts needed to do the conversion, including custom fitted battery racks. I looked at a pair of 914's a couple in Prescott Valley had for sale, and fell in love with the blue one. I could just feel myself driving the car around town silently on its battery power. Then I started looking at what else would need doing, such as replacing the front disk brakes with larger ones capable of stopping not only the basic car, but an additional 1200 to 1400 pounds of batteries and modifying the suspension. The car was a 1973 model with all the possibilities for problems brought about by that many years. It was a small car which was very challenging for me to get in and out of, and the cost of conversion was MUCH more than that of the pickup. ....but it would be a lot of fun! An S-10 is also a very popular car for electric conversion. It has a lot of space for batteries it has the weight carrying capacity for all the batteries and the other specialized components needed for the conversion, and if done right, it is still fully usable as a pickup truck. Also, as I would be doing more of the work, it is a lot less expensive. I went back and forth between "fun" and "practical" and finally chose "practical". I just could not justify the extra cost to convert the Porsche. I figured about the same cost to buy the "donor car", but the kit approach was just too much money, and I didn't want to tackle the much more difficult job of fitting the battery cases into the irregular spaces available. I started looking at both Porsche 914's and Chevy S-10's
on Craigs list
about the time I started seriously considering this project, and found
several of each. There were a lot of S-10's, but relatively
few with
manual transmissions. This is a must for EV
conversion. Of
course all the Porsches had 5 speeds.
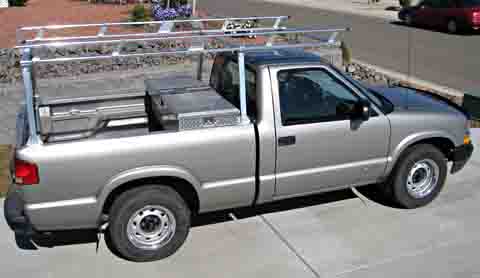
My Decision After making my decision, I spotted a nice looking 2002 Chevy S-10 in Verde Valley, about an hour's drive from here. I pursued it and ended up buying it for well under what I thought I would have to spend. It is a pretty silver truck with an aluminum ladder rack and an aluminum tool box in the bed. It is pretty well stripped of extra features, but that is ideal for a conversion. I spent the first couple weeks of June reviewing on line ads from a number of EV parts suppliers and gradually narrowed down my choices. I start Spending! 6/18/08 Today I placed my first order for parts. I have been going back and forth between the Curtis and the Zilla controllers. The Zilla is a very top-of-the-line unit with many features I really like, and includes a computer link which lets you program just about all its parameters.. The downsides are the higher price and a quoted 24 week delivery time. The Curtis is a basic modern controller which comes from the factory preset for typical conditions and is available immediately for less money. Searching the authorized dealers for Zilla, I found EVSource who listed the Zilla as "on order" I talked to Ryan there and found he should be able to deliver in much less time. I put a deposit on the controller and bought several related items. Time for more Tools! I identified several tools that I would need for this
project, which
I do not have. During the last several days of May, 2008 and
the
first several days of June I managed to buy an engine hoist from
Craigslist,
my S-10 pickup from Craigslist, and a new Lincoln MIG welder and
accessories
on sale from a local Welding supply house. I still need a
hand held
angle grinder. A couple of days after buying my truck, I
listed my
'97 Saturn on Craigslist and sold it in the first hour! A few
days
later I listed my old Sears arc welder (which I never did get very good
at using) and sold it in several days from Craigslist. To
help make
more room, I listed my antique Tektronix "half refrigerator size and
weight"
scope on the Craigslist "for free" ads and got rid of it in less than
an
hour. Craigslist has been good to me!
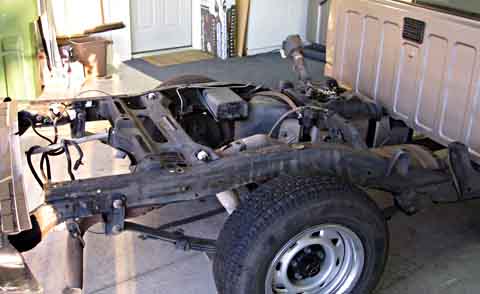
I bought a Makita angle grinder at Home Depot. This particular one had a promotional deal where they include a diamond wheel as well as the normal abrasive one. It should do a good job cleaning up my welds. Over the next couple of days I ordered my main drive motor, an Advanced DC Motors ADC FB1-4001A from EV America, along with some monitoring gages, and a kit which allows me to tip up the bed (like a dump truck) to allow access to the batteries. I then ordered a transmission to motor adapter from Electro Automotive. I will probably order most of the remaining parts from EV Source, as they have been far more responsive than the others, and their prices are quite good. Raw Steel Stock 6/20/08 I did a preliminary design of my battery boxes and estimated my steel requirements. Steel has gotten really expensive lately! The clerk at Prescott Steel said it had gone up 60% since the start of the year! I bought about $200 of angle iron, strap iron, and square tubing. My ladder rack did a fine job of getting the 20 foot lengths home. Now that I have my steel, I was able to take off the rack, at least until the conversion is over. I used my engine hoist to hold one end of the rack, while I walked the other off the truck, pushing the hoist along as I went. I was able to remove a few bolts and fold the stanchions flat and lean the rack against the side wall of the motor home garage (inside). I also removed the tool box. It is now just a pickup truck. I need to actually receive some of my parts before I start pulling all vestiges of the gasoline engine, radiator, exhaust system, and fuel system, etc. Soon now! I'm on my way! The Realities of Buying EV Parts 6/25/08 OK, now I am getting frustrated! I have placed orders with 3 different companies who sell EV conversion parts. One of them has been very responsive, always returning my emails within a few minutes. I have also received some items from them. The other two apparently do not want my business. It is almost a week now and they have not responded to my order. I have to talk to them or communicate by email in order to pay them. I have called and been told someone would get "right back" to me, but it has not happened. I wish the first vendor carried all the equipment I need! I finally got to talk to a "real person" at the 2nd vendor and I got my parts on order from his company. The next day I also received a call from a lady at the 3rd company saying someone would get with me soon. 7/2/08 I never heard back from company 3, so emailed them to cancel my efforts at ordering parts from them. I emailed and called a company in Canada and ordered the transmission adapter and motor mount hardware. They have them in stock and will ship immediately. By the 4th I had confirmation that they truly did ship. Hopefully, I will now start getting some parts to allow me to start the conversion "for real". 7/10/08 I received the transmission adapter today, along with the front motor mount parts. It all looks good. Destruction! 7/11/08 I started disassembling the
truck today. I
removed the tail/stop light assemblies and the license plate lights,
disconnected
the fuel filler pipe, removed 8 bolts, and using my engine hoist,
removed
the bed. I then removed the hood. The frame under
the bed was
covered in a thin layer of caked dirt. I drove the bedless
truck
out to the driveway and used my pressure washer to clean the
frame.
It did a remarkable job!
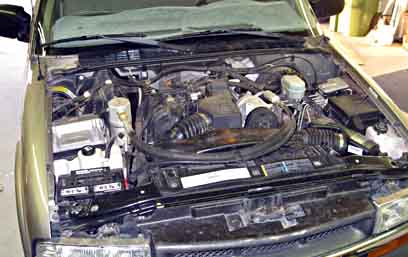
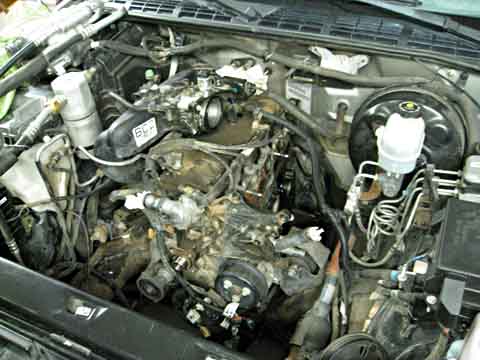
7/12/08 Over the next several days,
I pulled everything
I could from and around the engine. I then drained the
antifreeze,
engine oil, and transmission oil. The radiator I removed is
brand
new. It was installed just before I bought the
truck. I removed
the radiator and all cooling and heating hoses. Eventually I
had
removed the exhaust manifold, starter, alternator, and engine
mounts.
I pulled the shift lever from the transmission, and the transmission
mount.
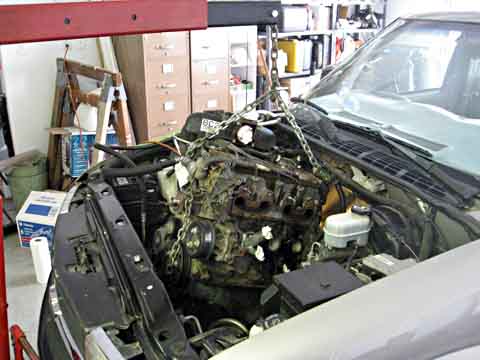
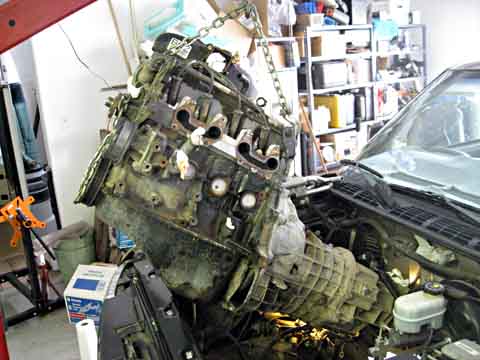
After making sure all the wires, hoses and mounts between the engine
and
the chassis were disconnected, I used my engine hoist and removed the
engine
and transmission.
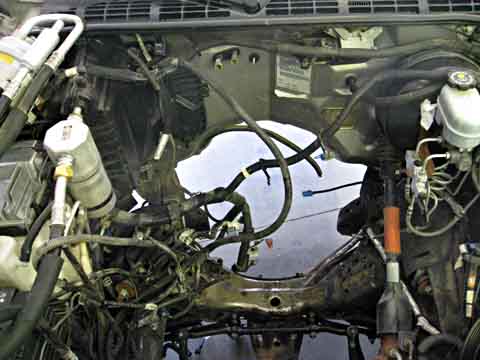
Engine Removal
Saving the Gas! 7/17/08 As there was still about 10 gallons of gasoline in the tank (About $40 worth!) I designed a system to transfer it to the Subaru. I bought a 5 gallon gas can (if a plastic container can be called a can). I then cut the harness going to the in-tank fuel pump, and connected it to a simple wiring harness. I removed the fuel lines between the tank and the fuel filter, pulled the filter and lines from the frame, and reconnected the lines to the tank. The filter was now on the end of about 3 feet of flexible fuel lines to the tank. I connected the harness to a 12 volt battery. I had a switch in the harness which I put in a plastic zip-lock bag to isolate any sparks from any gasoline fumes. Using this setup, I pumped a total of about 10 gallons into the gas can in 3 sessions. I put all I could in the Subaru until it was full. I still have almost 5 gallons left in the can for later use, and the truck tank is as empty as the pump can make it. Now I removed the fuel tank and all remaining fuel
associated items
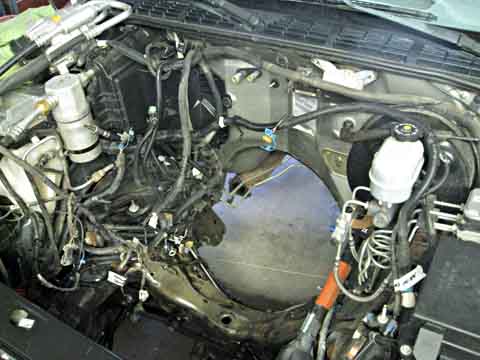
and lines. Then I removed the exhaust system. Now
the truck
is as empty as it will get except for the excess wiring harnesses.
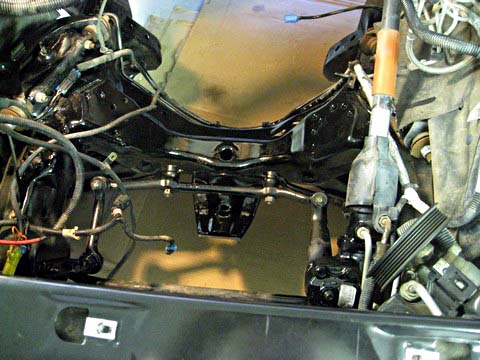
While waiting for the motor to arrive, I went through the various wiring harnesses and removed all that I deemed were not required. This cleaned up the hood area considerably. I then pulled the front seal and the clutch actuation cylinder from the front of the transmission and replaced them. Finally the motor arrived! I now have enough
parts to actually
start putting things back into the truck.
This is the progress through July 17, 2008 To go to the next section, click here.
|
||||||||||||||||||||||||||||
|
Dick
Mason, Prescott, AZ 6/21/08
|