Handicap Lift and Access Ramp
As Betty's Arthritis prevents her from climbing steps, we needed some means to get her in and out of the motorhome, which has a floor height of about 42 inches. I did two things to provide for
this: I installed an electric
lift for her use away from home, and I built an access ramp that lets
her
walk directly into the rig when it is parked in our RV garage.
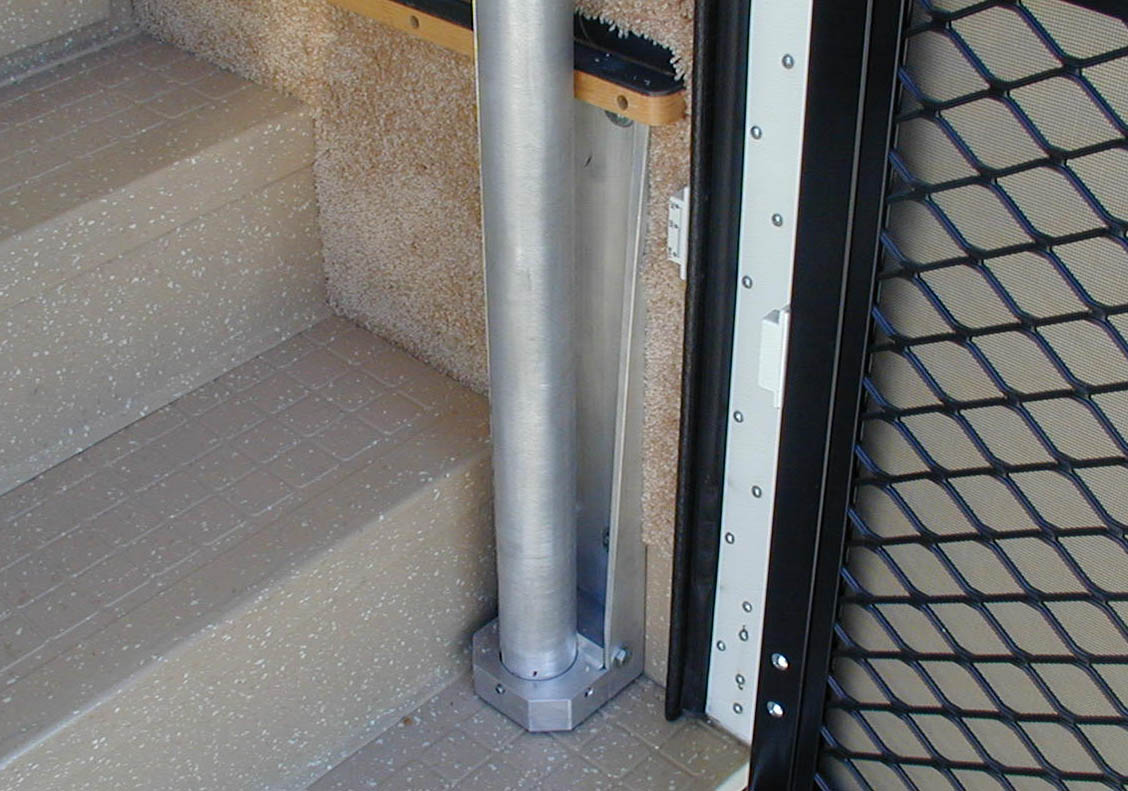
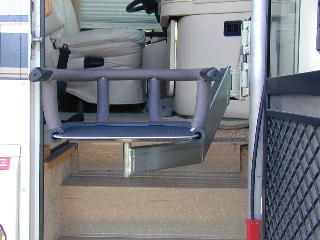
The Lift: The lift we chose was a Lectra-aid electric chair lift, originally designed to be mounted on the exterior wall of the motorhome, just behind the door. In operation a two piece hinged bracket is pinned to a pivot point on the lift, a chair is placed into the outer pivot of the brackets. The person using the lift sits in the chair and is raised. When fully up, the multiple pivot points of the bracket allow the chair to be passed through the standard width door where the rider can stand inside on the floor. This is how I mounted the lift on our two previous motorhomes. On our new Foretravel I did not want to mount the lift on the outside for two reasons: First I did not want to scar the beautiful outside of our new coach. Second, as the new unit is already 102 inches wide, the added 6 inches of the lift when mounted on the outside would make driving the rig dangerous, as well as being illegal in every state. After making many measurements, I determined
I could mount the lift
indoors with a dropped bracket to get the chair low enough to sit in
from
the ground. I contacted the maker of the lift who told me of
the
thousand or more lifts he has sold, only one had been mounted indoors.
I talked to the engineering department at
Foretravel who suggested carrying
the weight from a main frame member. I designed a lower
bracket from
a length of 4 inch aluminum channel with a machined block at the
bottom.
This mounts through the stairwell wall and bolts into a major chassis
railmember.
The top of the lift is supported with a bracket extending up from the
corner
dashboard frame member.
All the measurements were made on coaches at
the Escondido Foretravel
dealership, which was about 6 miles from home. I then
machined all
the parts in my downstairs shop and loaded them up to meet our
motorhome
when we took delivery away from home. I field installed the
lift
and it all worked!
We used the standard dropped bracket set supplied by the maker for a while, but the dimensions were marginal for getting the chair through the door with the inside mount. I re-designed the brackets to work well for our situation and had the lift maker make me a custom set. This now provides us an excellent way for
Betty to enter and exit the
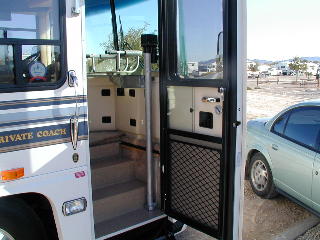
coach, it is protected from the elements, and is hardly visible from
outside
the coach. An additional advantage of the inside mounting is
that
we no longer have to remove and store the brackets for
travel. We
lift out the chair, put it on the floor behind the passenger
seat,
and bungee the brackets to a handle on the dash.
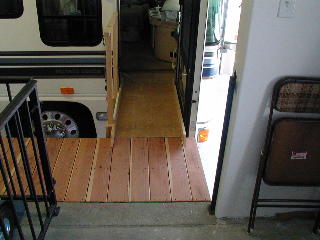
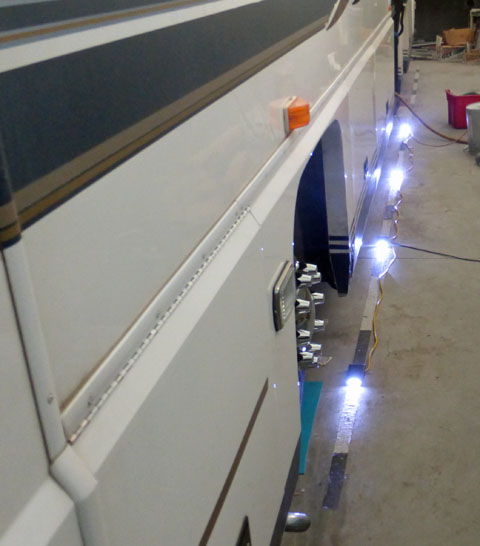
The Ramp: When we moved to Prescott, Arizona in late 2002, we did several things to assure easy access for Betty. The home we "built" is a very nice manufactured home on about a 1/4 acre lot in a manufactured home subdivision. I planned for the home to be lowered and the garage to be raised from the normal heights so the floor levels were equal. On the other side of the garage is our RV garage which has the floor 42 inches lower than that of the house and garage. After getting partially settled, I built a redwood landing which extends the garage floor level about 3 feet into the RV garage. From this I built a sturdy wooden ramp which bridges the gap from the landing to the motorhome floor (with the sliding floor in the extended position). An alternating stripe of black and white duct tape on the garage floor allows me to park the rig very accurately in the same position each time. I can easily get within 2 inches in each direction. The ramp will work with about a 6 inch variation. Betty can now walk all the way from the house into the rig using her walker with no outside assistance. Subsequent Changes I later modified this setup slightly, as I realized that the air solenoid for the floor slide was always energized when the floor is extended. I was also concerned about the safety ramifications if the sliding floor were to somehow retract with the ramp resting on it. To eliminate these concerns, I made a floor member from a piece of plywood that lays on the guides for the retracted floor slide and supports the ramp. This eliminates the constant current draw and provides a solid walking surface into the rig, and it will prevent the floor slide from extending, even if the switch is turned to do so. I also made changes in the duct tape parking guide system. As I back into the motorhome garage, the sun often hits directly on my driver's side mirror and makes seeing the tape very difficult. First, I bought a length of "rope light" from Sam's Club. I placed this in a wooden guide along the top of the tape. I used this for several years, but it was still very hard to see under bright outside conditions. I finally bought some LED strobe lights on Ebay, and placed several of the lights on the tape. This works great! I can see the flashing lights continuously from the street all the way back into the garage, even if I have bright sun directly on a dirty side mirror.
|
||||||||||||||||
|
Dick
Mason - Prescott, AZ 12/10/03
|