Doing Body Work and Replacing the Graphics
My
Foretravel is now over 15 years old, and over the years it has obtained
a certain amount of "hangar rash". The decals are also in various
states of showing their age. Some are curling up on the edges,
some have edges broken off leaving a ragged edge, and a couple of the
smaller ones have disappeared completely.
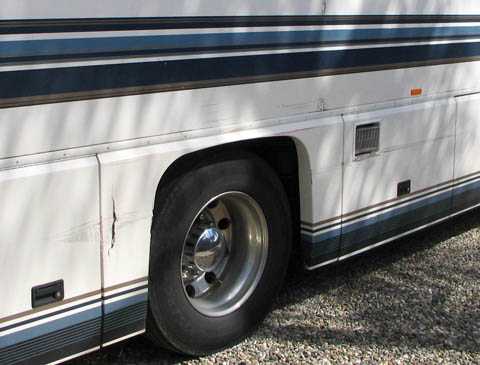
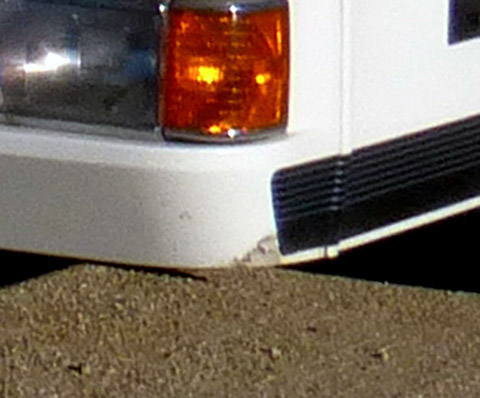
The most significant body problem was the result of a tangle with a pickup truck about 10 years ago. At the time I needed the insurance money more than I needed a top notch repair job, so I did some basic repairs myself on a "temporary" basis, figuring that as I had time I would finalize the work to high standards. Well, there is nothing so permanent as a temporary repair, and nothing has been done until now! Additionally I had several areas such as a front bumper damaged by hitting bottom while entering a driveway, a fender with some cracking caused by a blown tire at the end of our very first trip, and fiberglass chipping at the bottom of a couple compartment doors caused by insanely tall rocks lining the edge of narrow campground roads. This is one problem of having a very low riding coach!
This is the original damage from the pickup truck in 2005. The water compartment door
on the right has a long groove embossed across the width of the door and the bezel around
the water heater vent is "munched" along the bottom. The fender is slightly damaged on the
right side, and the skin was torn through behind the tire. The door behind the tire was
slightly damaged. The awning mount was torn out from the sidewall and an awning
bracket was broken. There were also deep scratches above the fender.
I initially repaired the torn fender, cleaned up a lot of the dark smears, but left the depression
in the door. I covered the damaged bezel part with white duct tape. I used white primer
that matched very well over the repairs.
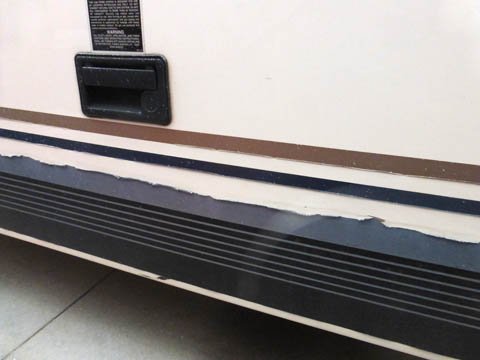
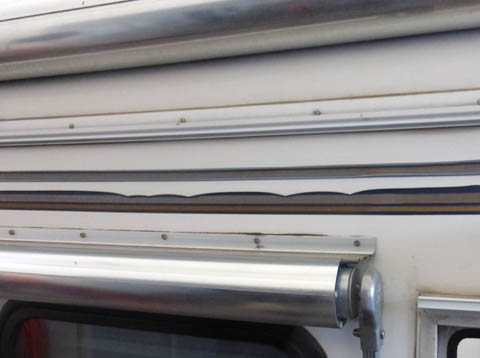
In some locations, the decals were in terrible condition! Here you can see edge damage and severe curling of the edges.
On the right, the upper stripe is curled up along both edges making the stripe appear about half width. When flat the top
stripe has 7 color stripes in it.
Initial Plans
My motorhome finish is all fiberglass with a gelcoat finish. Gelcoat is difficult to work with when doing repairs, so I thought I would either get professional help finishing the repairs with gelcoat, or I would do the repairs myself finishing with a matching automotive paint. I talked to the only independent fiberglass repair technician I could locate in the area and he was overwhelmed by the size of the project. It seems he mostly repairs damage to showers and bathtubs. I then decided to go the auto paint route, even to the point of buying the paint and having it color matched.
Final Repairs
I then thought more about it and decided the Foretravel is too fine a machine to not repair it correctly. After doing a lot of on-line reading about working with gelcoat, I decided to give it a try. I tried to order gelcoat from Foretravel directly. They said they would be happy to sell it to me, but they could not ship it, as they do not possess a hazardous shipping permit. If I knew someone traveling to Nacogdoches Texas, they would let him deliver it to me. I knew of no such person. I then went to their supplier's website and found the correct product! Unfortunately, the smallest size they offered was a 55 gallon drum! So I ordered some gelcoat on-line along with some tinting colors to try to match it myself.
There is a problem trying to color match gelcoat, whether you do the repair using gelcoat or a paint product. Over time, the gelcoat darkens. If you sand or buff the gelcoat, it will lighten up to near the original tint. You need to decide whether you are going to match it now, or let it age into a match. I chose to try and match the original color, allowing it to gradually darken to a better match.
The first area I worked on was the left front bumper where there was a whole section
broken out from hitting bottom going up a poorly designed driveway at a post office.
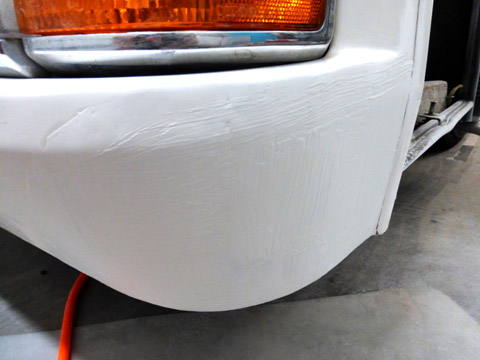
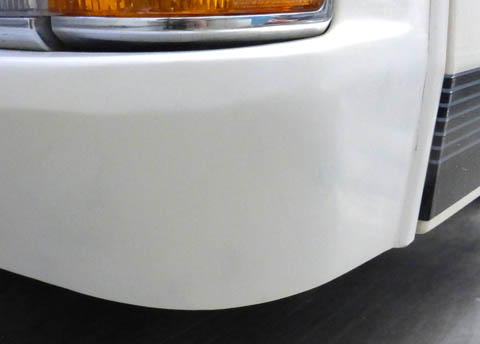
I ground out all the damaged areas of fiberglass and repaired it using new fiberglass resin and mat. I finished with some body filler and then
coated it with hand brushed on gelcoat. As you can see, it did not flow out at all. After much sanding, I applied another coat of resin and spread it
with a steel squeegee. This worked very well, but overall I needed to do this process several times before I managed to sand it smooth and not sand
through any thin spots. Once it was basically smooth, I kept wet sanding with finer and finer sandpaper up to 1200 grit. I then buffed it out using auto polish.
This was the general technique I used on all the subsequent repair areas, whether sprayed or brush applied.
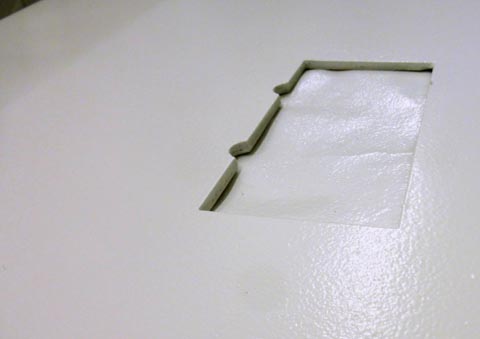
During the initial repair years ago, I filled a couple of deep scratches with a supposedly
white filler. It cured to a dark gray! I now used a Dremel type tool to grind out the old
filler in preparation to filling the scratches with gelcoat. It took several applications
but came out looking quite good.
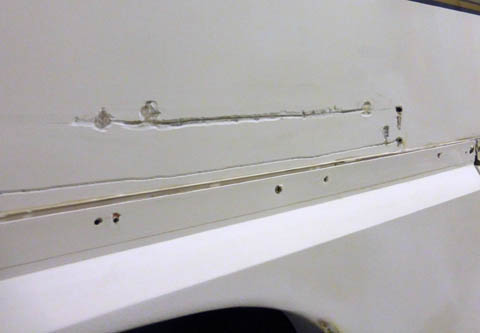
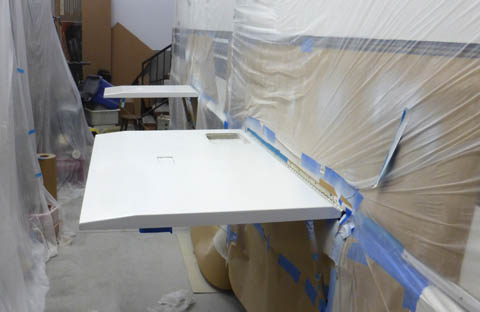
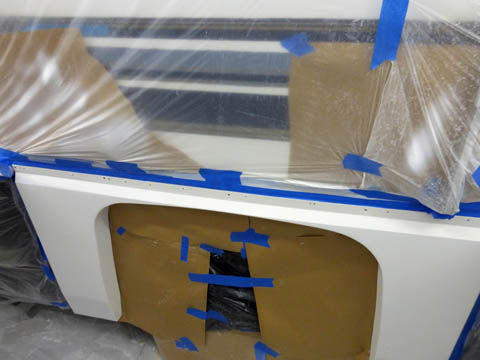
Here I have the water compartment door filled and smoothed, ready for gelcoat.
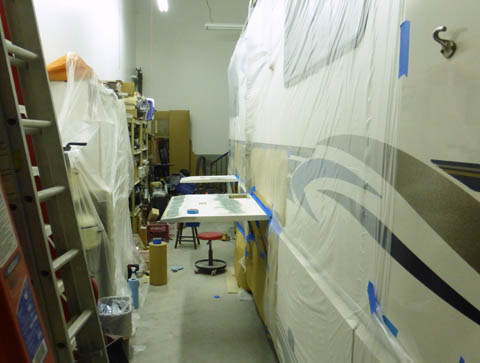
I then thoroughly masked around the doors, then using dollar store tarps (I bought
9 total) I protected the side of the motorhome and the shelves opposite.
To spray the relatively thick gelcoat resin, you must thin it. I used about 25% acetone, then using a low cost HVLP (high volume,
low pressure) spray gun from Harbor Freight, successfully sprayed the two doors. It left a substantial amount of orangepeel as shown
by the picture on the right. I found that by sanding enough to provide a flat top surface, removing any residual wax coating with lacquer
thinner, then applying a quantity of gelcoat and spreading it with a steel squeegee, I was able to create a surface smooth enough to
be easily sanded to a perfect finish. Sometimes there were small areas needing an additional fill process. The end result after all the
sanding steps was an extremely smooth, flat, almost reflective surface. Using auto polish and a buffer added the gloss to the surface.
While I was spraying the resin, I wore a respirator (not just a dust mask), and a "bunny suit". I also partially opened the front and rear garage
doors to keep the air somewhat clear. The respirator worked great! I could not smell the strong solvent or fiberglass smells while spraying!
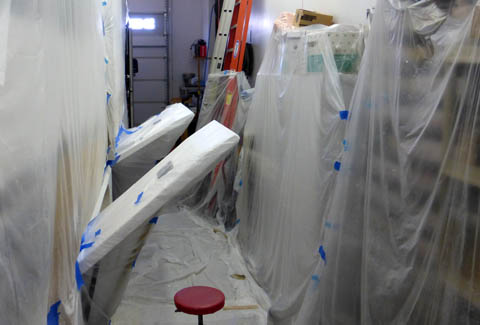
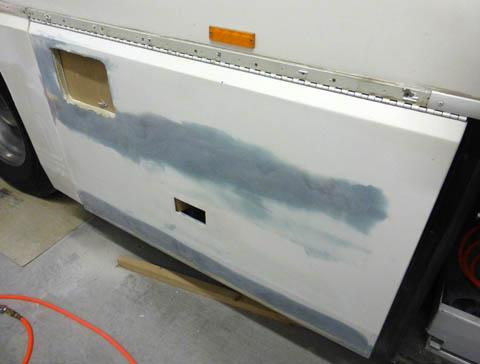
I masked the completed doors in preparation for the spraying of the fender. I put the
heavy plastic on the floor after spraying the small door and seeing how much splatter
ended up on the floor.
I hate color matching! As I was tinting a fresh can of gelcoat, carefully counting the
drops of black and yellow as I had previously done, a blob of black dropped
instead of a drop. I thought it might be close enough after comparing small samples,
but after spraying the fender I could easily see it was too dark. After ordering yet another
quart of gelcoat, I carefully tinted it and prepared to respray the fender. This time it came out fine.
I discovered a small area of damage near the tailpipe, which I repaired in a manner
similar to the front bumper. With what I had learned, this one went much faster and
easier! I also got pretty good at removing the old striping in the areas needing repair!
The most significant body problem was the result of a tangle with a pickup truck about 10 years ago. At the time I needed the insurance money more than I needed a top notch repair job, so I did some basic repairs myself on a "temporary" basis, figuring that as I had time I would finalize the work to high standards. Well, there is nothing so permanent as a temporary repair, and nothing has been done until now! Additionally I had several areas such as a front bumper damaged by hitting bottom while entering a driveway, a fender with some cracking caused by a blown tire at the end of our very first trip, and fiberglass chipping at the bottom of a couple compartment doors caused by insanely tall rocks lining the edge of narrow campground roads. This is one problem of having a very low riding coach!
This is the original damage from the pickup truck in 2005. The water compartment door
on the right has a long groove embossed across the width of the door and the bezel around
the water heater vent is "munched" along the bottom. The fender is slightly damaged on the
right side, and the skin was torn through behind the tire. The door behind the tire was
slightly damaged. The awning mount was torn out from the sidewall and an awning
bracket was broken. There were also deep scratches above the fender.
I initially repaired the torn fender, cleaned up a lot of the dark smears, but left the depression
in the door. I covered the damaged bezel part with white duct tape. I used white primer
that matched very well over the repairs.
In some locations, the decals were in terrible condition! Here you can see edge damage and severe curling of the edges.
On the right, the upper stripe is curled up along both edges making the stripe appear about half width. When flat the top
stripe has 7 color stripes in it.
Initial Plans
My motorhome finish is all fiberglass with a gelcoat finish. Gelcoat is difficult to work with when doing repairs, so I thought I would either get professional help finishing the repairs with gelcoat, or I would do the repairs myself finishing with a matching automotive paint. I talked to the only independent fiberglass repair technician I could locate in the area and he was overwhelmed by the size of the project. It seems he mostly repairs damage to showers and bathtubs. I then decided to go the auto paint route, even to the point of buying the paint and having it color matched.
Final Repairs
I then thought more about it and decided the Foretravel is too fine a machine to not repair it correctly. After doing a lot of on-line reading about working with gelcoat, I decided to give it a try. I tried to order gelcoat from Foretravel directly. They said they would be happy to sell it to me, but they could not ship it, as they do not possess a hazardous shipping permit. If I knew someone traveling to Nacogdoches Texas, they would let him deliver it to me. I knew of no such person. I then went to their supplier's website and found the correct product! Unfortunately, the smallest size they offered was a 55 gallon drum! So I ordered some gelcoat on-line along with some tinting colors to try to match it myself.
There is a problem trying to color match gelcoat, whether you do the repair using gelcoat or a paint product. Over time, the gelcoat darkens. If you sand or buff the gelcoat, it will lighten up to near the original tint. You need to decide whether you are going to match it now, or let it age into a match. I chose to try and match the original color, allowing it to gradually darken to a better match.
The first area I worked on was the left front bumper where there was a whole section
broken out from hitting bottom going up a poorly designed driveway at a post office.
I ground out all the damaged areas of fiberglass and repaired it using new fiberglass resin and mat. I finished with some body filler and then
coated it with hand brushed on gelcoat. As you can see, it did not flow out at all. After much sanding, I applied another coat of resin and spread it
with a steel squeegee. This worked very well, but overall I needed to do this process several times before I managed to sand it smooth and not sand
through any thin spots. Once it was basically smooth, I kept wet sanding with finer and finer sandpaper up to 1200 grit. I then buffed it out using auto polish.
This was the general technique I used on all the subsequent repair areas, whether sprayed or brush applied.
During the initial repair years ago, I filled a couple of deep scratches with a supposedly
white filler. It cured to a dark gray! I now used a Dremel type tool to grind out the old
filler in preparation to filling the scratches with gelcoat. It took several applications
but came out looking quite good.
Here I have the water compartment door filled and smoothed, ready for gelcoat.
I then thoroughly masked around the doors, then using dollar store tarps (I bought
9 total) I protected the side of the motorhome and the shelves opposite.
To spray the relatively thick gelcoat resin, you must thin it. I used about 25% acetone, then using a low cost HVLP (high volume,
low pressure) spray gun from Harbor Freight, successfully sprayed the two doors. It left a substantial amount of orangepeel as shown
by the picture on the right. I found that by sanding enough to provide a flat top surface, removing any residual wax coating with lacquer
thinner, then applying a quantity of gelcoat and spreading it with a steel squeegee, I was able to create a surface smooth enough to
be easily sanded to a perfect finish. Sometimes there were small areas needing an additional fill process. The end result after all the
sanding steps was an extremely smooth, flat, almost reflective surface. Using auto polish and a buffer added the gloss to the surface.
While I was spraying the resin, I wore a respirator (not just a dust mask), and a "bunny suit". I also partially opened the front and rear garage
doors to keep the air somewhat clear. The respirator worked great! I could not smell the strong solvent or fiberglass smells while spraying!
I masked the completed doors in preparation for the spraying of the fender. I put the
heavy plastic on the floor after spraying the small door and seeing how much splatter
ended up on the floor.
I hate color matching! As I was tinting a fresh can of gelcoat, carefully counting the
drops of black and yellow as I had previously done, a blob of black dropped
instead of a drop. I thought it might be close enough after comparing small samples,
but after spraying the fender I could easily see it was too dark. After ordering yet another
quart of gelcoat, I carefully tinted it and prepared to respray the fender. This time it came out fine.
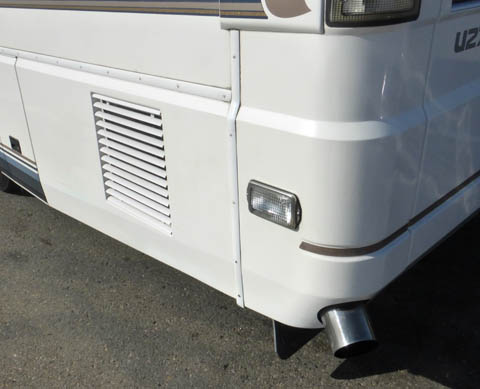
I discovered a small area of damage near the tailpipe, which I repaired in a manner
similar to the front bumper. With what I had learned, this one went much faster and
easier! I also got pretty good at removing the old striping in the areas needing repair!
Replacing the Graphics
I had a deadline to meet to finish the body work, as I had already scheduled the re-striping job for September 1. I finished the last bit of gelcoat repair with over a whole day to spare. On Tuesday 9/1 I drove my rig 2 1/3 hours down to Apache Junction to a company called RV Stripes and Graphics, and left my rig. They will strip all the markings from the motorhome, design and print replacements on a 3M vinyl film, then install it all. Samples of their work look excellent.
Steve, who is the manager (boss, owner?) and I talked and emailed to coordinate the schedule, many of the details of specific stripes, patterns, and logos. He emailed me samples of the various stripe combinations and color selections. I requested several changes, then we agreed on many details and it was all in his care. It was frustrating sitting at home, not being able to follow the progress, and watch them work. It is over a two hour drive in the car, and about 20 minutes more in the motorhome, so I did not drive down to interfere. They did the work in an inside bay that did not have any excess room. Steve apologized for not taking progress pictures for me, but said it was just too cramped. Rats!
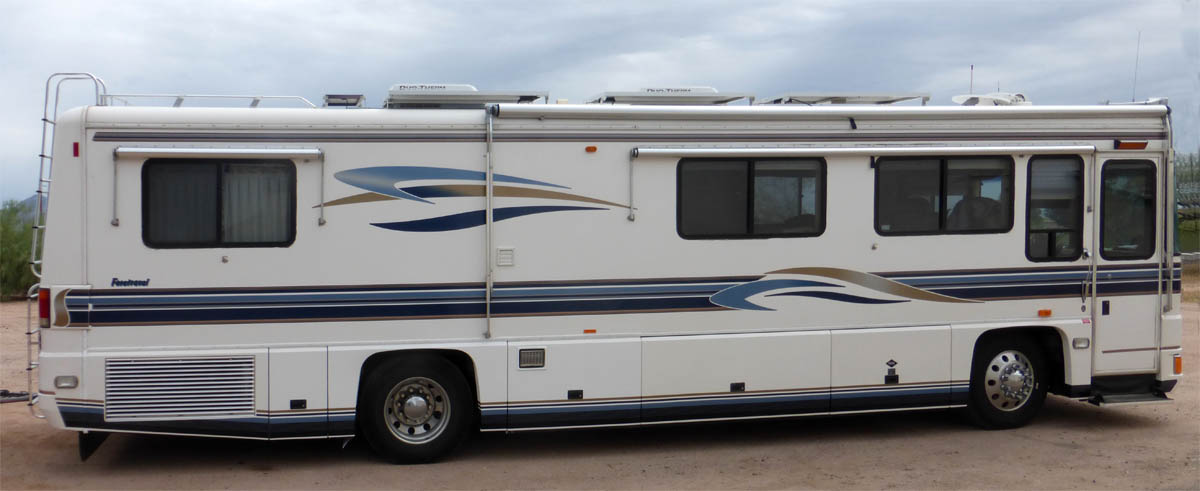
On Thursday, 9/10, one day ahead of schedule, the motorhome was ready! I drove down and saw it; it is beautiful!! I brought it home and received other opinions, also that it is beautiful. The pattern is almost exactly the original one, but the colors are bright and vivid, and none of the edges are curled, and none of the trim is missing!
I did take exception to the way they printed a Foretravel logo that is used in 4 places. I believe they inadvertently switched the two colors so the shadow effect is lighter than the lettering. I "redid" the logo in Photoshop and it looks far better with the lettering in light blue and the shadow in dark blue. Steve is printing a new set of these logos and will send them to me. I does not look like much of a problem for me to remove the old ones and install the new ones.
Note from Sept 13: I received the new logos, and after much delaying I started the job. It took about an hour, and most of that time was peeling off the reversed logos and washing the areas thoroughly. Putting on the new ones was a "piece of cake".
The new graphics are guaranteed for 5 years, but are stated to typically last at least 7 or 8 years. I hope it will be much more, as I keep the rig garaged.
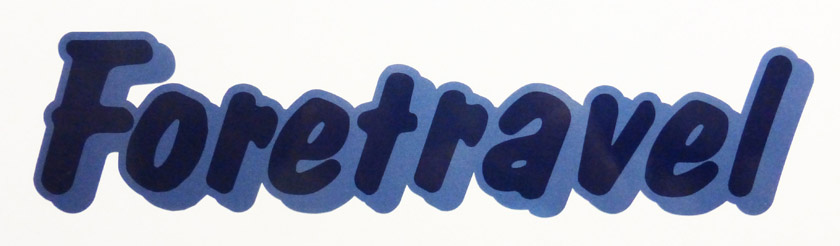

The erroneous logo is on the left. On the right is what they are making me. It doesn't really look like it, but the
two images are identical except for swapping the colors. Light colors just look larger than dark ones!
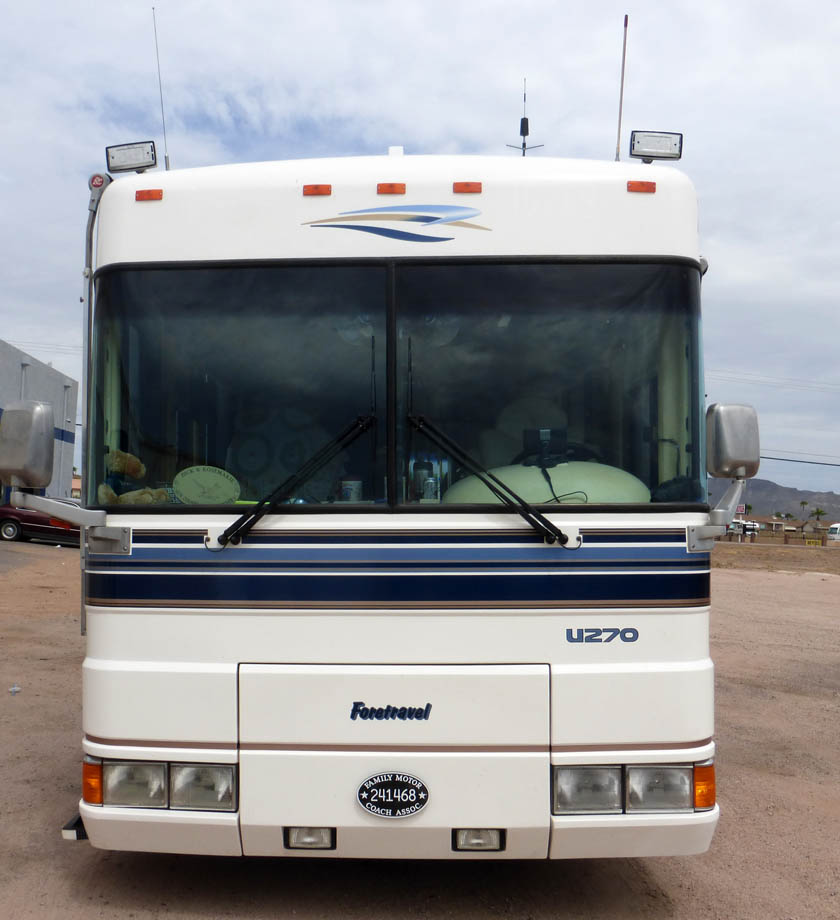
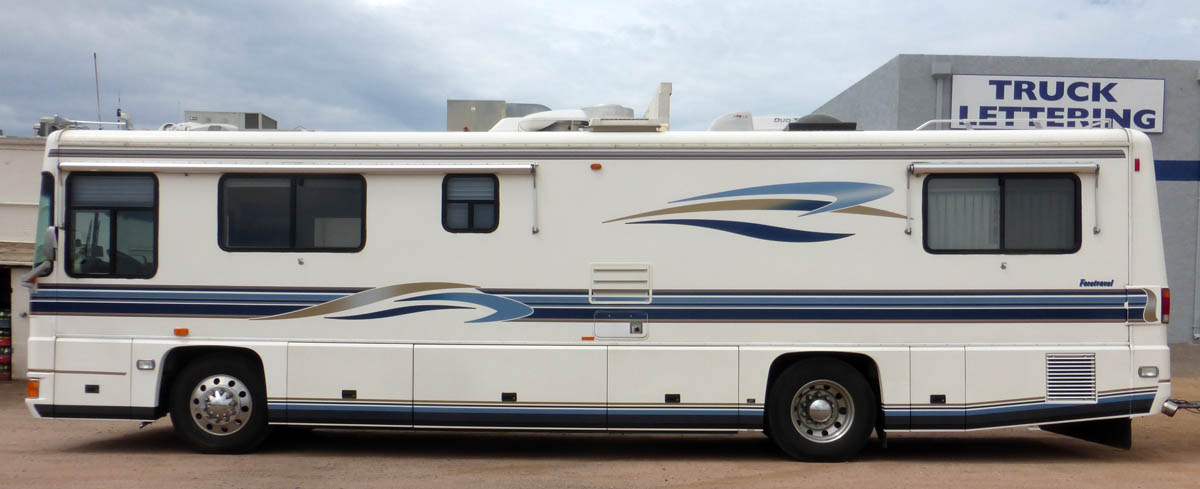
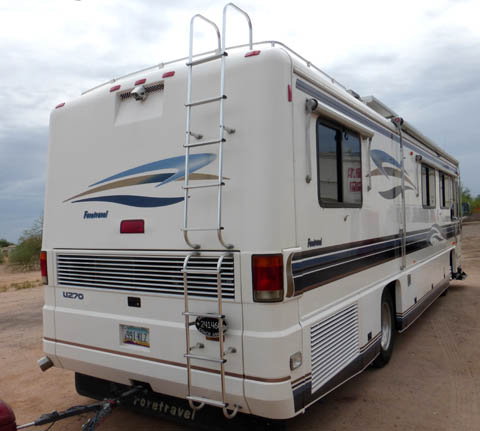
Here are the first pictures of my newly re-striped motorhome, taken at RV Stripes and Graphics before I drove it home.
I had a deadline to meet to finish the body work, as I had already scheduled the re-striping job for September 1. I finished the last bit of gelcoat repair with over a whole day to spare. On Tuesday 9/1 I drove my rig 2 1/3 hours down to Apache Junction to a company called RV Stripes and Graphics, and left my rig. They will strip all the markings from the motorhome, design and print replacements on a 3M vinyl film, then install it all. Samples of their work look excellent.
Steve, who is the manager (boss, owner?) and I talked and emailed to coordinate the schedule, many of the details of specific stripes, patterns, and logos. He emailed me samples of the various stripe combinations and color selections. I requested several changes, then we agreed on many details and it was all in his care. It was frustrating sitting at home, not being able to follow the progress, and watch them work. It is over a two hour drive in the car, and about 20 minutes more in the motorhome, so I did not drive down to interfere. They did the work in an inside bay that did not have any excess room. Steve apologized for not taking progress pictures for me, but said it was just too cramped. Rats!
On Thursday, 9/10, one day ahead of schedule, the motorhome was ready! I drove down and saw it; it is beautiful!! I brought it home and received other opinions, also that it is beautiful. The pattern is almost exactly the original one, but the colors are bright and vivid, and none of the edges are curled, and none of the trim is missing!
I did take exception to the way they printed a Foretravel logo that is used in 4 places. I believe they inadvertently switched the two colors so the shadow effect is lighter than the lettering. I "redid" the logo in Photoshop and it looks far better with the lettering in light blue and the shadow in dark blue. Steve is printing a new set of these logos and will send them to me. I does not look like much of a problem for me to remove the old ones and install the new ones.
Note from Sept 13: I received the new logos, and after much delaying I started the job. It took about an hour, and most of that time was peeling off the reversed logos and washing the areas thoroughly. Putting on the new ones was a "piece of cake".
The new graphics are guaranteed for 5 years, but are stated to typically last at least 7 or 8 years. I hope it will be much more, as I keep the rig garaged.
The erroneous logo is on the left. On the right is what they are making me. It doesn't really look like it, but the
two images are identical except for swapping the colors. Light colors just look larger than dark ones!
Here are the first pictures of my newly re-striped motorhome, taken at RV Stripes and Graphics before I drove it home.
R. S. Mason 9/11/2015