Hi all,
Things are really moving now! Every day there is something exciting happening.
Saturday, Jan 4
I headed out to the house and there was Ed, the owner of the concrete
company doing his final cleanup on my concrete work. The main task
he was doing was to cut the "stress cracks" into the concrete. They
like to pour their indoor floors as a large area, then, using a diamond
saw, cut the groves in the finished slab. The other way to have done
it would have been to run a joint tool into the wet concrete and cast the
groove directly in. He cited an example of trying to use a creeper
to work on your car in a garage. With the cast-in-place grooves,
the wheels will drop in and stick as you pass over. With the cut
grooves they pass over freely. (I posted this picture last time -
hope it was not too misleading!)
The Northlake crew dug an extension to the footing for the wall between the driveways and poured it with some excess concrete from a pour across the street.
Monday, Jan 6
I went out to the house around 7:30, which is just barely light here.
There on the back of the lot next door was a large pile of lumber.
There were bundles of 2 x 6's, 4 x 6's, 4 x 12's, lots of 2 x 4's, trim
pieces, and large stacks of chipboard and exterior finish panels.
Ralph was there doing the final crack repair and touch up from a list I had given him. He expects to finish in about an hour.
Steve and I discussed ceiling heights, door clearances, areas for windows, etc. I have an appointment to talk to the framers at noon today. He has a crew of framers he uses when he is busy, or for large jobs. Both situations are true for our job.
I talked to Scotty, one of the framers, and we went over all the ins and outs of the job. I gave him sketches showing all the doors and windows. The drawings done by a designer were adequate for the city permits, but did not show a lot of the details I want. In fact, I never had a chance to review the drawings until after all the permits were obtained. Scotty says they should be able to start our job on Thursday - Friday at the latest.
After getting home and starting to work on a layout of the driveway wall, I got a return call from the garage door supplier who suggested meeting at the house in a half hour. As I had been trying to contact him for several days, I agreed. We discussed panel size, ceiling clearances, framing dimensions, and windows. After about a half hour we had decided on the door color, panel pattern, and window design. As the RV garage door is an odd size, 13 feet wide by 14 feet high, it is a factory order, so both doors are being ordered from the factory. They should be ready in about 2 weeks. Steve asked if I could do a CAD layout of the block arrangement, so it could be built to the correct contour prior to grading the actual driveways. I went back home and finished the layout.
Tuesday, Jan 7
This morning Fermi was working on the wall. He is finishing it
out to about 3/4 of its length until the rest of the utilities are put
in.
This afternoon, Steve was doing grading on the east side and front of the house. He then dug down to the electrical conduit he needs to extend to the house and then dug a trench from there to the house. He will continue to dig for the water and gas lines, with the phone and cable in there somewhere. When I left you could see the electrical conduit and the trench was dug all the way to the house. When these utilities are all buried, Fermi can finish the wall. Also, once the utilities are in, Steve can cut down the west side of the lot alongside the RV driveway. I am keeping the ground level even with the driveway all the way to the RV garage. It will then slope up gradually along the length of the garage to full grade height in the rear.
I am now laying out the electrical outlets, lights, and switches for the garages and shop. If the framing is finished in about 2 weeks as Scotty said, the electricians will be right behind.
Wednesday, Jan 8
It rained most of today. I swung by the house to check on the
status. There was a perfectly HUGE conduit (it must be 4 inches in
diameter!) running the length of the trench and up the left front wall
of the garage. This will allow the power company to pull their cables
from a small interconnect box at the edge of my RV driveway to the main
electrical panel which will be on the front of the garage. I picked
up a few supplies at Home Depot, and ran into Steve, Tom, and Scott there
also. This afternoon the rain let up, and Steve was going to try
to finish installing the utilities. I'll see in the morning.
Thursday, Jan 9, and Friday Jan 10
The cable TV and phone lines were run near the electric and the trench
for them was pretty well filled in. Steve then trenched for the water,
and a conduit for the gas company to run their gas line through a short
distance outside the one for the electric. He then did quite a bit
of grading around the driveways and in front of the house.
Friday afternoon, Betty and I drove to the north end of Phoenix and had dinner at Black Angus to celebrate anniversary #43.
Saturday, Jan. 11
The framers did not meet their "Friday at the latest" promise, although
we did have one day of rain since the promise, so I guess Monday will technically
meet it..
Steve dug a trench along the west side of the RV driveway for the water line to the RV garage. The line from the meter went to a shutoff valve just behind the meter (This is in addition to the one in the meter housing.) From there it runs to the pressure regulator and then to a tee. One side of the tee feeds the house, the other has another shutoff valve and feeds the RV garage hose bibs. The regulator, tee, and RV shutoff valve are at the bottom of a cement water meter housing. The shutoff valve just after the meter is in a large PVC pipe which extends up to the surface.
Sunday, Jan. 12
We drove by the house to see what had been done Saturday after I left,
and didn't notice anything obvious. Then as we were driving away,
I saw that our rear wall had been extended to join with Ernie's wall next
door. Steve had mentioned he was about ready to do this, but I totally
missed the actual work. I think it finishes the wall off nicely.
It drops down 16 inches at a time in a couple of places. The bottom
section of the wall is higher than Ernie's where it ties in with it.
They left one block on its side down low providing 2 "culverts" through
the wall for drainage.
Monday, Jan. 13
The framers had "just a little" to finish up before moving to our job.
In about an hour they actually drove over and set up their generator and
compressor to run their saws, drills, nailers, and impact wrench.
They start by matching "green board" to the footings and drilling holes for all the J-bolts and any conduits coming from the floor. They then mark the stud locations on both this board and the top plate. Studs are cut to the right length and the wall is nailed together. Of course windows and doors make the process slightly more complex, but the first walls had none. Before I left in the early afternoon, the rear car garage wall and the two short walls on each side of the door were all up and braced to be plumb and true. The 4 x 12 laminated beam header was lifted up to the top of the garage door and nailed in. They were in the process of fitting the last of the green boards around the RV garage and cutting a number of studs to build these walls as I left.
Tuesday, Jan. 14
When I arrived at the site, they were busy building walls. They
built all the walls for the motorhome garage except for the stub walls
between the garage and the RV garage. These were up yesterday.
There were 7 new walls total. The west side was built in 3 sections
and the east side, 2. By lunchtime, all the walls had been built
and were laying down or propped onto something all around the RV garage.
Four of Steve's crew came over to help raise the walls. One by one,
with about 5 or 6 people per wall section, they walked it up to a vertical
position, carefully lifted it over the tie-down bolts and set it in place.
There is a foam plastic gasket placed under all the walls, on the footings.
While the base of each wall was being tightly bolted to the footing, braces
were nailed into the wall at a couple of locations and anchored to a footing
or wall some distance away. The wall section was now pretty stable.
These wall sections of 2 x 6 studs a little over 12 feet high and about 16 feet long, some with window headers, are heavy! When all the sections were up, tied to each other and braced, Scotty was very anxious to get some "shear panels" in place to make them very stable. The entire RV garage is "sheared" using 1/2 inch OSB (chipboard). Once this is in place, there is virtually no movement of the wall along its length. I mentioned that the walls were a little over 12 feet high. These walls are built on a block wall that is about 42 inches high. The total floor to ceiling height of the RV garage is going to be 16 feet, 1 inch in the front, a little less in the rear as the floor slopes slightly toward the front for drainage.
Wednesday, Jan 15
The shear panels were pretty much all in place this morning, except
for a few at the top of the walls. Scotty and Jessie were building
the outside shop wall, and after a while had it up and braced. Shortly
later, the shop rafters started getting put up. My shop ceiling is
going to slope at the same angle as the roof. A set of 2 x 6 rafters
will be the separation between the roof and the ceiling. I can now
get a good idea of the space I will have. I have just over 7 1/2
feet floor to ceiling along the outside wall, sloping up to almost 10 feet
against the RV garage. Height should not be a problem!
Steve was hoping the building inspector would arrive to buy off the front deck footing rebars, as he was hoping to pour the footing shortly when a concrete delivery for the driveway across the street came. The truck arrived and they partially poured the driveway when the inspector arrived. They were then able to pour my footings when they finished the driveway. Whew!
After emptying the truck and filling all but about 5 feet of the footing trench they started leveling and troweling the footings. They try to set all the parts of the footing level, stepping it in 4 inch increments as the level changes. This allows the block wall to be built and end up level across the full length of the top. Steve had to run to the office, so I took over the transit duties. The workers would hold a tape measure just at the surface of the concrete, I would take a reading and tell them "Up 1/4", or "Down 1/8". They usually understood and did the correct change. Getting the footing accurate within 1/4 inch is close enough, as there is that much latitude in mortar thickness for the block layer.
Betty and I drove out to the house near the end of the day. They had all the rafters in place up to the 45 degree gully where the patio roof meets the shop roof. I am not sure yet if I will have the ceiling just continue at the single slope all the way to the garage end of the shop, or if I should have the compound angle ceiling. I'll decide that tomorrow!
Tomorrow morning they are having a crane (some are calling it a boom truck) come to lift the trusses up to the 16 foot level for the RV garage. I am sure they will also use it to lift the 4 x 12 laminated header to the top of the door opening of the RV garage. That should all be fun to watch.
The next couple of days should have the garages, porches, and shop all looking pretty much like the finished items (shape wise). Then quite a bit of time will be spent putting on the finish siding, trim, roofing, deck, etc. I believe the electricians can come in once the interior carpentry is finished.
I have been delaying the sending of this report until I had some significant progress to show. I will send it now and leave the more finishing stuff (like the roofs) until next time.
I have posted some more photos on-line at:
http://members.isp01.net/rmason/statusreports.html (that's this site)
Till next time,
Dick
 |
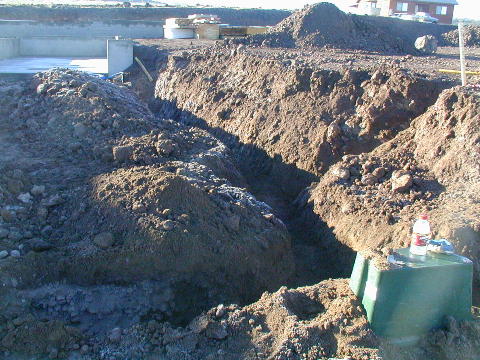
| Steve is digging the trench for the electric, phone, and cable TV.
----- |
 |
| Now he is digging the water and gas trench. The electric trench
has been filled in, and is to the left of this one.
----- |
 |
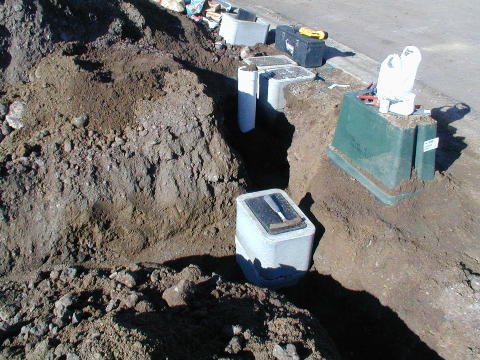
| And this is the water trench to the RV garage.
----- |
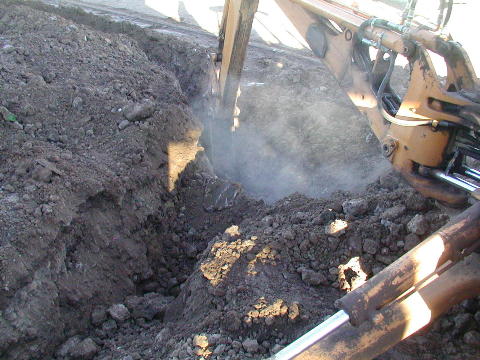 |
| He ran into some large rocks, which were quite a problem getting out!
----- |
 |
| This is the box protecting and providing access for the regulator,
tee, and RV shutoff valve. This box will be extended to be flush
with the final grade. In the background near the water meters is
the pipe giving access to the main shutoff valve.
----- |
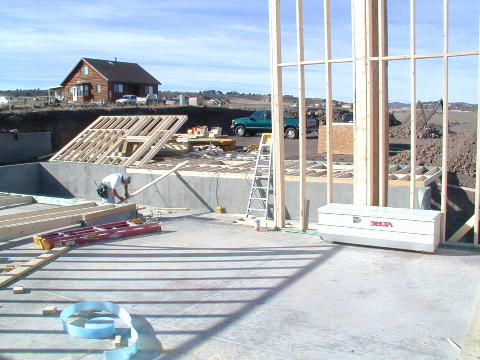 |
| There are walls leaning and laying all over the place.
----- |
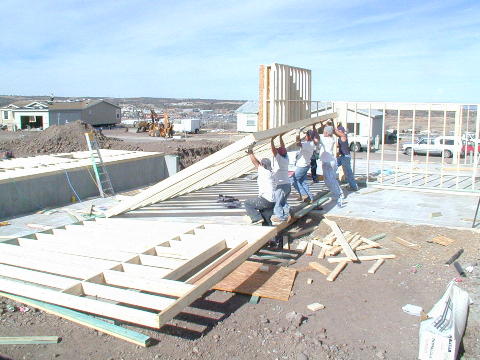 |
| The first of the "big" walls is going up. This is the heaviest
of the lot, as there are two windows (with 4 x 6 headers), and it is the
longest.
----- |
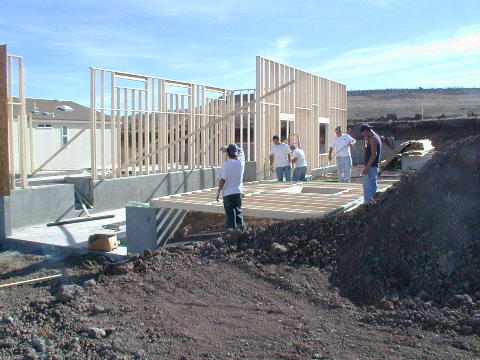 |
| They are getting ready to raise the last of the large walls.
----- |
 |
| The final stub wall goes in place. Now everything can be tied
together.
----- |
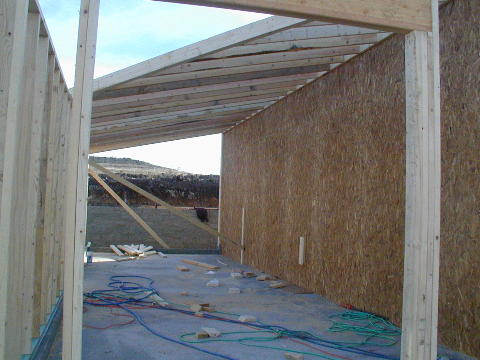 |
| The east RV garage wall has been totally "sheared" and the roof rafters
are started for my shop.
----- |
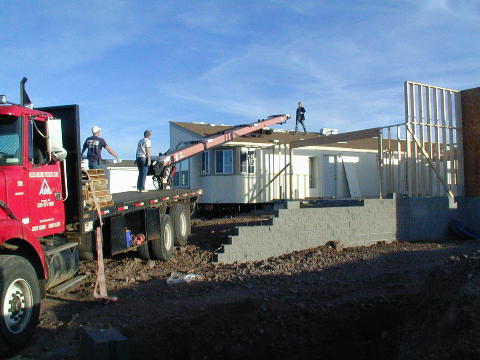 |
| The conveyor truck is loading roofing materials onto the house roof.
----- |