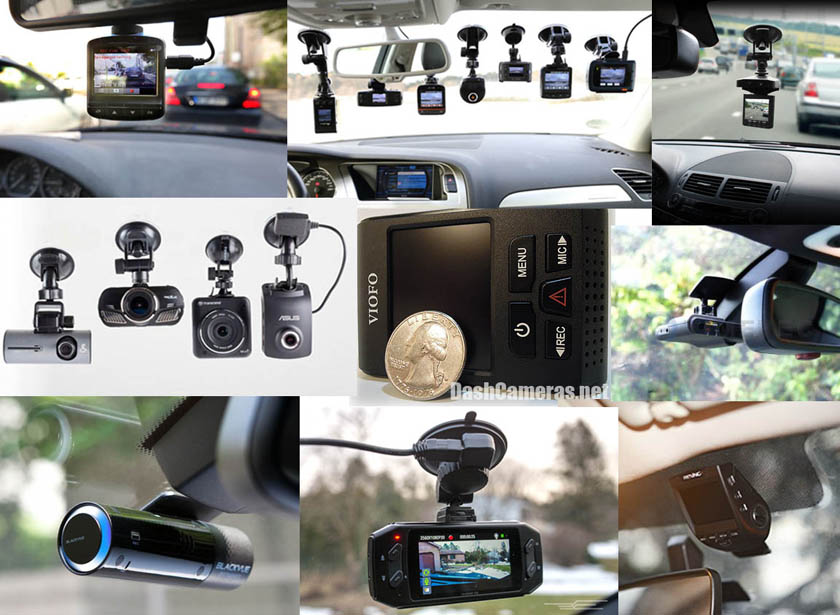
This collage shows just a few of
the literally hundreds of dashcam models. There are some that are
really ungainly and
downright ugly, and others that don't look so bad. I really don't like the ones that are just hanging from a massive mount!
The center picture is of the model I eventually selected and bought.
downright ugly, and others that don't look so bad. I really don't like the ones that are just hanging from a massive mount!
The center picture is of the model I eventually selected and bought.
My Selection:
There are cameras available that range from under $50 to well over $250. I confined my search to ones around $100 and chose the simple forward looking only type which by far has the most models available. I then decided on a wedge shape camera with a small viewing screen. I then narrowed that down to a Viofo A119S. This unit or a slightly earlier model A119 have been rated by several reviewers as the best low cost camera. At its cost of just over $100, I felt that this was the best camera for me to buy, especially since it was the configuration and had the features I wanted. I also bought a high endurance 64 GB micro SD card for it which should record about 7 1/2 hours before overwriting the oldest files. I also bought a circular polarizing filter to minimize reflections and a kit for hard wiring it to the car.
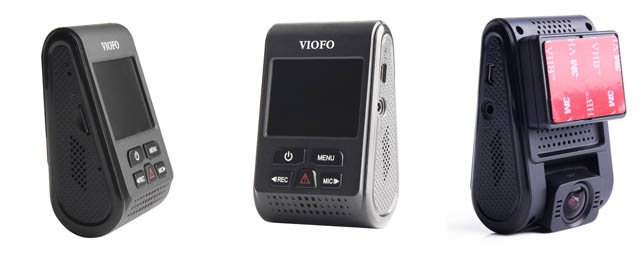
This is the camera I bought. The right hand view shows the included GPS module attached. This is also
the mount for the camera, and once adhered to the windshield, the camera can easily be un-clipped. The
lens can be adjusted up or down after installation.
A few of the features of this camera are:
- 1080P 60 frame per second recording
- One of the best night time sensitivities on the market
- f1.6 all glass lens
- 135 degree lens angle
- Comes with the GPS module which is optional on other models
- Uses super a capacitor instead of battery for good high temperature tolerance*
- Can use up to 128GB micro-SD card (about 15 hours on highest resolution setting)
- 2 inch LCD screen for menu setting and preview viewing of videos
- GPS is in the mount so camera can be easily removed without handling any wiring
Installation:
The camera is a wedge shape with a mounting clip area on one side and the viewing screen and control buttons on the other. At the large end of the wedge is the lens which can pivot up and down for proper alignment after mounting. The kit comes with 3 different mounting pads, all of which have a layer of 3M adhesive on one side and a clip to attach the camera on the other. There is a very thin pad for mounting the camera as close to the windshield as possible, one slightly thicker which allows enough space to mount the optional circular polarized anti-reflection filter, and the primary one which is about 5/16 inch thick that contains the GPS module. Their suggested installation is to clean the mounting area of the windshield, clip the camera to the desired mount, peel the protective paper from the adhesive and stick it in place. The wiring they provide is a long USB cable which plugs into the GPS (or the camera if no GPS is used) and is routed down to a cigar lighter socket (now called a power socket). They provide a plug for the power socket with 2 standard USB slots, one for the dashcam, and another to charge your phone, ipod or ?. I ordered a hard-wire kit as I didn't want to tie up my power socket.
I installed the camera and GPS module as they said, cleaning the inside of my windshield very well, and finishing with an alcohol wipe where the adhesive was to go. I played around a little with the exact location of the camera and decided on placing it a little to the left and slightly lower than I thought was optimum for making the camera inconspicuous. I did this as a compromise for better access for seeing the screen and pressing the buttons, which will be seldom required, but still needs to be done. I then plugged in their USB cable and attached it to my power socket as a trial. I took the car out for a short drive and was very pleased with the results. I then installed the circular polarized filter which I had bought with the camera and tried it again. There was much less reflection of the dashboard and other interior parts of the car, although I noticed some rainbow colored reflections when I was facing directly into the sun.
Final Wiring:
Now that I knew that it all worked, I looked at what I needed to do for the final wiring. I probed both dashboard fuse panels (one on each end of the dash, accessible by opening the front doors) and found the right hand one had no circuits that switched on and off with the "ignition" switch. On the left hand one I found 2 fuses that powered on and off with the ignition, and the rest that were on all the time. It turned out that the two switched fuses were for the power outlets, which is perfect!
After reading other Volt owner's descriptions of how they ran their dashcam wiring, it became clear how to run the wiring. I had little problem hiding the wire under the front edge of the headliner, then by pulling the A column cover out slightly, hiding the wire behind its top edge, then continuing the wire down under the rubber door molding to the bottom of the dashboard. At that point the wire went under the bottom of the dash and up into the rear of the fuse area. I used a fuse splitter to give me another fused output, mounted the 5 volt power supply on a frame member and completed the wiring.
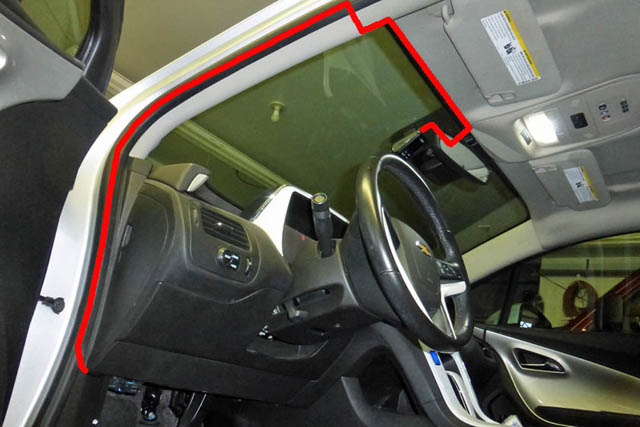
This shows the routing of the cable to supply 5 volts to the camera. The wire comes out of the camera, over against a factory electronics box,
up to the edge of the headliner where it is tucked in across to the left A pillar. By slightly pulling on the pillar trim, the wire dropped behind it
across the top and around to the door molding. It then follows the molding down to the bottom of the dash and under and up into the fuse
compartment. It made for an invisible installation, and I did not have to disassemble anything. It all just slipped under edges.
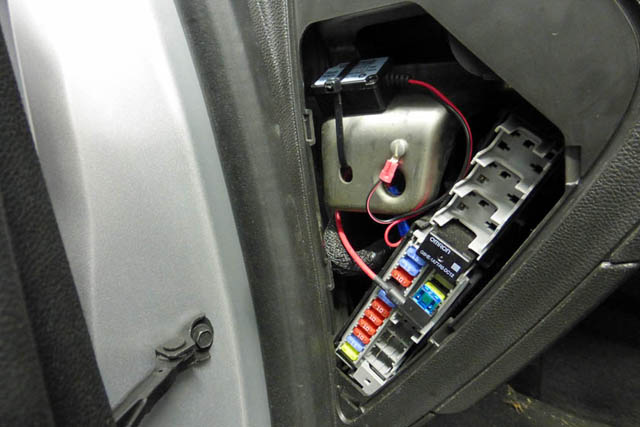
This shows the wiring to the fuse block. The fuse taps are wonderful! They plug into the block in place of the original fuse. You
then plug 2 fuses into the tap, the original one, and the new one. A wire provides power to your new fused circuit. I had to drill and tap
a hole into the frame for the ground wire. The 5 volt power supply is zip tied to the frame. With the slight service loop I left at the camera,
and the route I used, there was just barely enough wire to reach. I could not move the power supply to the right as I had wanted, as a
result it interfered with part of the plastic cover.
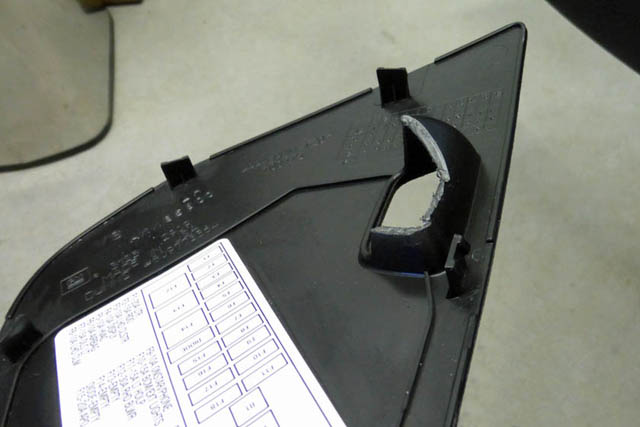
The guard around the finger hole hit the power supply, so I notched it to clear. It does not affect the use or installed appearance at all.
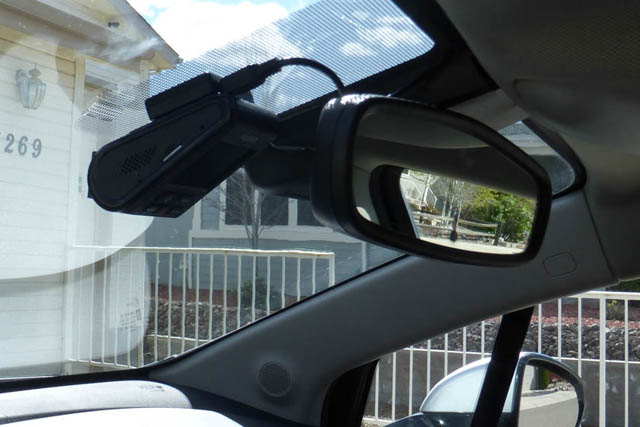
Here is the installed dashcam. The mounting block with the cable connected is the GPS unit. This provides an optional on-screen display of the current
lat/long coordinates and the speed. I am displaying the coordinates, but not the speed . The reason should be obvious- no 5th amendment for this!
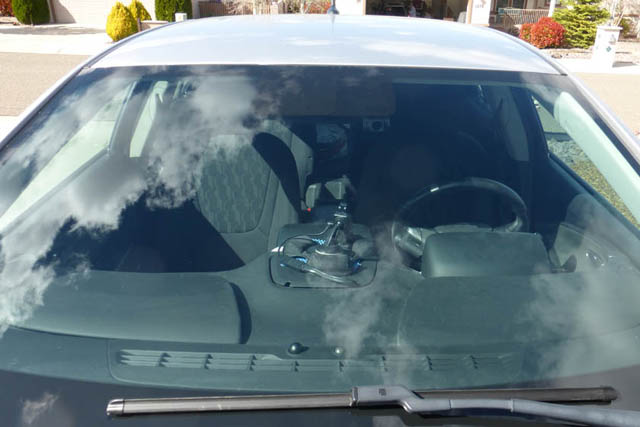
The camera is not too obvious from outside. Here you can see it just under the screened area in the
center of the windshield on the driver's side.
Results:
Of course this write up would not be complete without some of the resulting pictures. The daytime pictures are taken during a trip to a doctor's appointment in Prescott Valley, and the night time one was just around the corner from me. These pictures are not as sharp as the originals due both to the downscaling to put them on my site, and the fact that they are a "frame grab" from the original movie.
It's a beautiful day in the Prescott area! This picture was actually taken on my way home from the doctor, where I was not looking directly into the sun!
This shows the coordinates, the time and date stamp and the make and model of the camera placed by the manufacturer. I put in the MASON
instead of my license number.
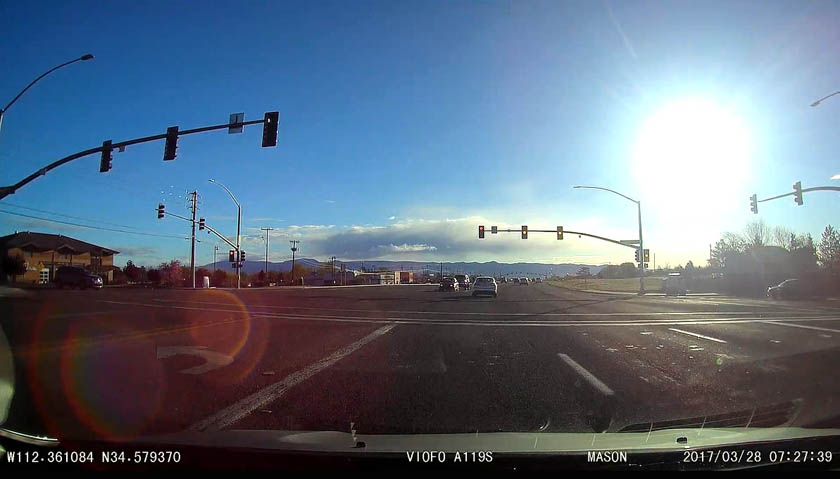
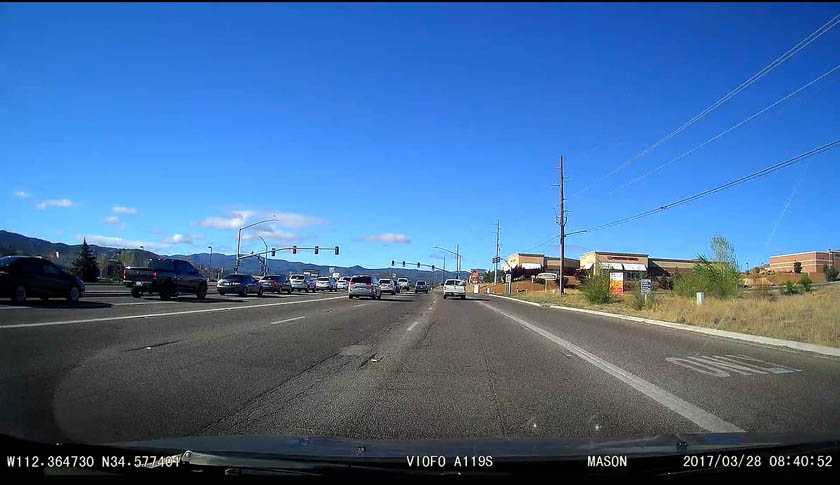
Here I am looking directly into the sun. (Yes, driving to my 7:40 appointment was nasty!) Although it washes out the area right around the sun,
the remaining picture is amazing considering the sun is actually within the field of view. There is some fading of colors and some rainbow colors
caused by the polarized filter, but you can easily see the traffic light colors and the position of all the nearby cars. I generally try to NOT drive
directly into a low sun!
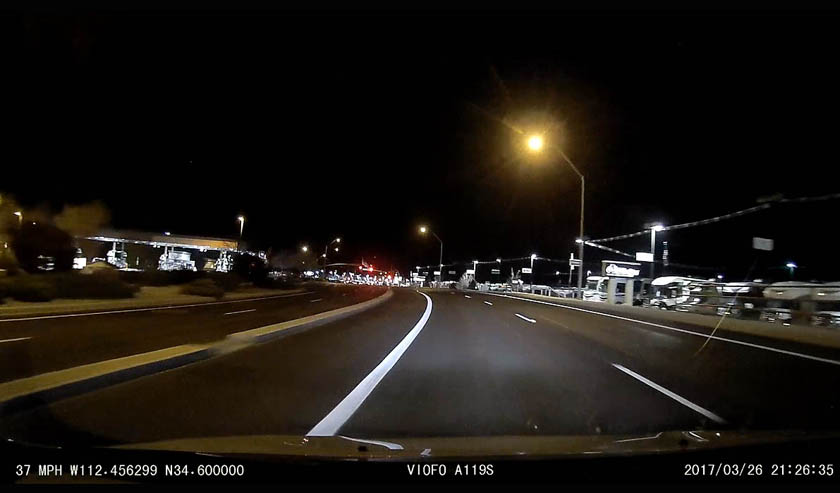
The night time videos are also amazing. This night performance is why I spent about $20 more for the "S" model camera. They changed the
sensor to a Sony and increased the size of the lens. There was not a lot of other traffic to include in this picture. This was taken before I
removed the speed and added MASON. I was OK here, it's a 40 mph zone.
Of course this write up would not be complete without some of the resulting pictures. The daytime pictures are taken during a trip to a doctor's appointment in Prescott Valley, and the night time one was just around the corner from me. These pictures are not as sharp as the originals due both to the downscaling to put them on my site, and the fact that they are a "frame grab" from the original movie.
It's a beautiful day in the Prescott area! This picture was actually taken on my way home from the doctor, where I was not looking directly into the sun!
This shows the coordinates, the time and date stamp and the make and model of the camera placed by the manufacturer. I put in the MASON
instead of my license number.
Here I am looking directly into the sun. (Yes, driving to my 7:40 appointment was nasty!) Although it washes out the area right around the sun,
the remaining picture is amazing considering the sun is actually within the field of view. There is some fading of colors and some rainbow colors
caused by the polarized filter, but you can easily see the traffic light colors and the position of all the nearby cars. I generally try to NOT drive
directly into a low sun!
The night time videos are also amazing. This night performance is why I spent about $20 more for the "S" model camera. They changed the
sensor to a Sony and increased the size of the lens. There was not a lot of other traffic to include in this picture. This was taken before I
removed the speed and added MASON. I was OK here, it's a 40 mph zone.
R. S. Mason 4/1/2017